Find out how to create a Badge Application that you review before issuing a badge.
Creating a Badge Application for review enables you to provide earners with a URL where they can apply or request to be issued with a badge.
This is a fantastic tool if you need to verify that earners are eligible for a badge, or require earners to complete a process to provide evidence that they have fulfilled the earning criteria.
Issuing a badge this way:
- Removes the need for you to gain written or verbal consent prior to issuing – by completing the application earners are volunteering to be issued with the badge.
- Makes a great badge acceptance rate far more likely, as earners have invested some time / effort in the process.
Before you start, consider the following:
- What information you need to gain from individuals through this application. Are they answering a few simple questions, uploading a file, or providing a booking confirmation?
- Who, either internal to your organisation or external, will be reviewing this application. Do they need any specific information to carry out the reviewing process, and do they have access to it?
- Whether a review process is necessary for your objectives. OBF offers a range of application options, and some require no manual review. If you are interested in creating an application with no review process, please see our guides for automating applications with claim code and passing a quiz.
To create a Badge Application for review:
|
1. Log in to Open Badge Factory. This will open your dashboard. |
|
2. Click 'Creator tools' from the navigation menu at the top of your screen.
|

|
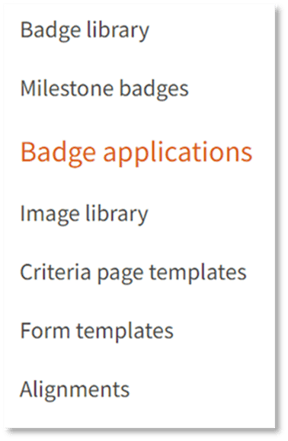
3. Click ‘Badge applications’ from the list of options on the left-hand side of your screen.
This will open a list of any existing badge applications that have been created with your account. 4. Click ‘+ Create new badge application’.
|

|
5. Click ‘+ Choose badge’ to select what badge you would like to issue through this application.
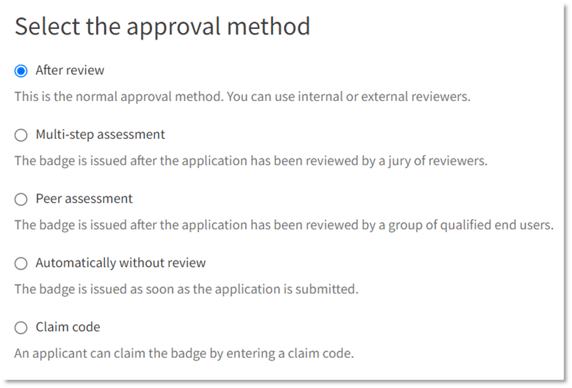
6. For approval method, select After review.
7. Click ‘Save’.
This will open Step 1 – Badge |


|
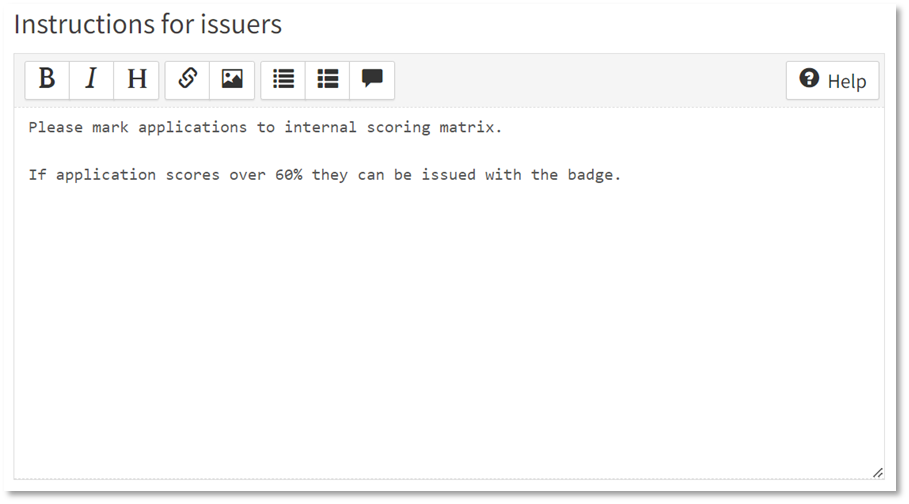
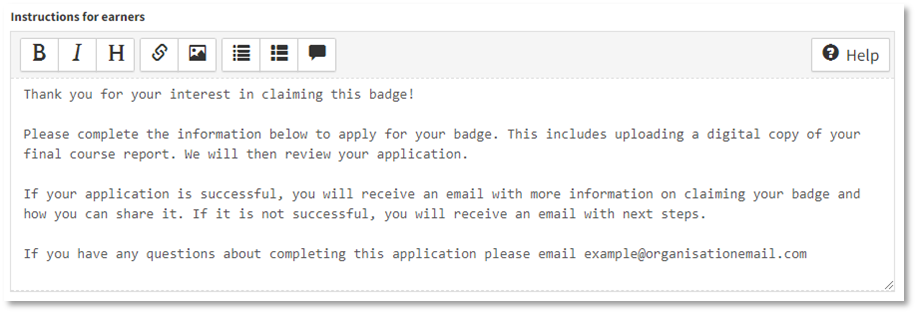
The first page features ‘Instructions for issuers’. 8. OPTIONAL - You may like to include instructions for any internal or external individuals that will be reviewing applications for this badge. For example, a scoring matrix or URL to event attendance records if this needs to be checked before issuing can take place.
9. When you are happy with your instructions, click ‘Continue’.
This will open Step 3 - Form |

|
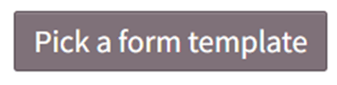
This could include information about the steps in the application process or what items of evidence they will be asked to provide. Now you can begin building the form for your application. Please note: The form will automatically collect earner names and email addresses, so you do not need to add elements to capture this information. If you intend to use the same application format regularly, you may like to create a form template so you can easily select it at this stage rather than starting from scratch each time. If you have existing templates, you can choose which one to use by clicking the ‘Pick a form template’ button.
To find out more about creating form templates, please see this guide.
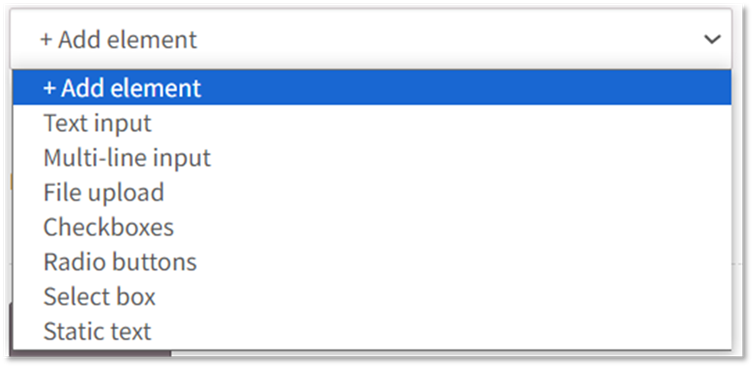
You have a wide range of options for building elements of your form based on the information or evidence you require individuals to provide: Text input Multi-line input File upload Checkboxes - the applicant can choose one or more options out of a selection of answers. Radio buttons Select box Static text
12. Create all of the elements required for your form. You can re-order or delete elements using the arrows and crosses. 13. When you are happy with your selection of questions / elements, click ‘Continue’.
This will open Step 3 – Message. |


|
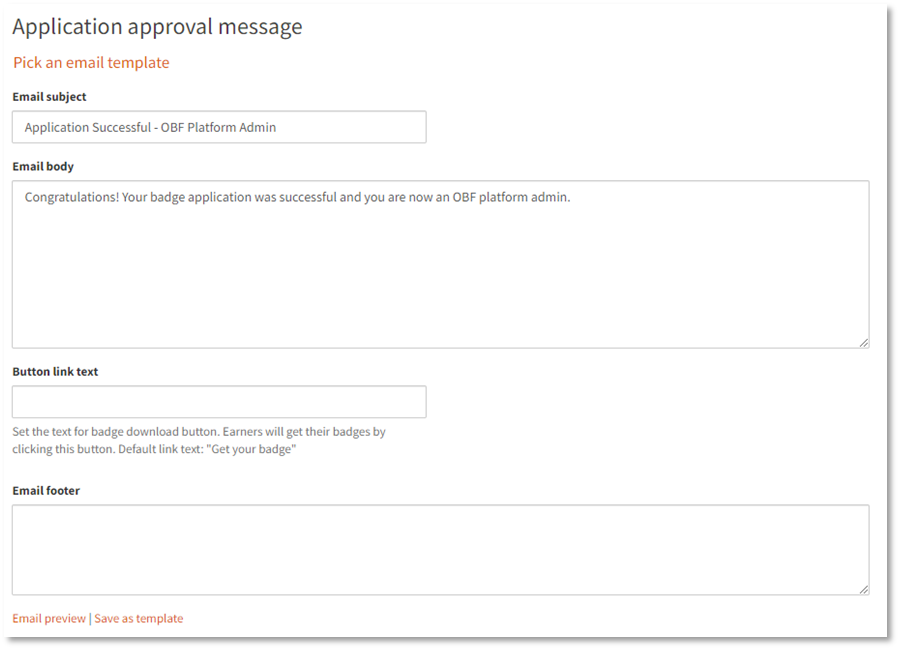
14. Set your application approval message. This is the email applicants will receive when their application has been approved and they are issued with the badge.
You can customise each of these fields to tailor to the respondent’s experience and preview what they will receive by clicking “Email preview”. Alternatively, click ‘Pick an email template’ to use an existing email template.
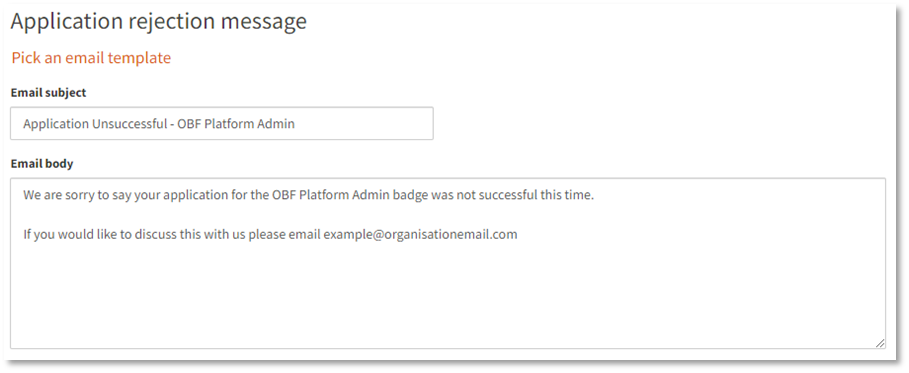
This is the email applicants will receive if their application has not been approved and they have not been issued with the badge.
Alternatively, click ‘Pick an email template’ to use an existing email template.
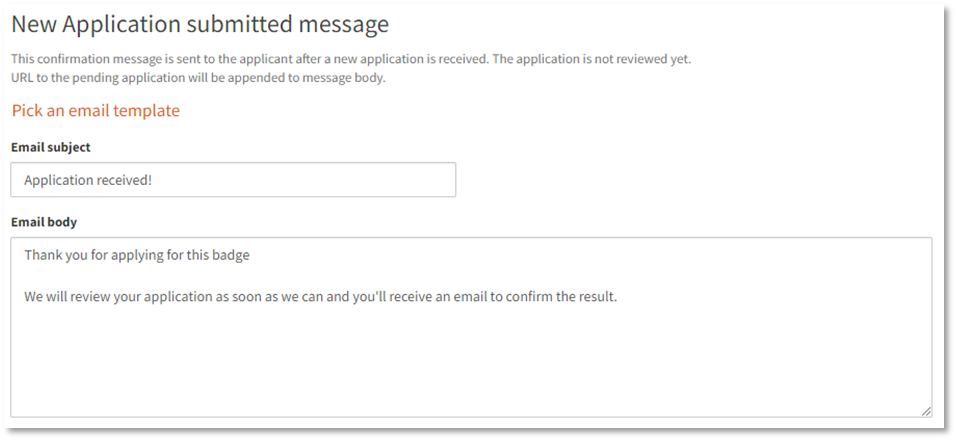
16. Set your New Application submitted message. This is the email the applicant will receive when they submit an application for review.
Alternatively, click ‘Pick an email template’ to use an existing email template.
This will open Step 4 – Reviewers. This will open Step 4 – Reviewers. |

|
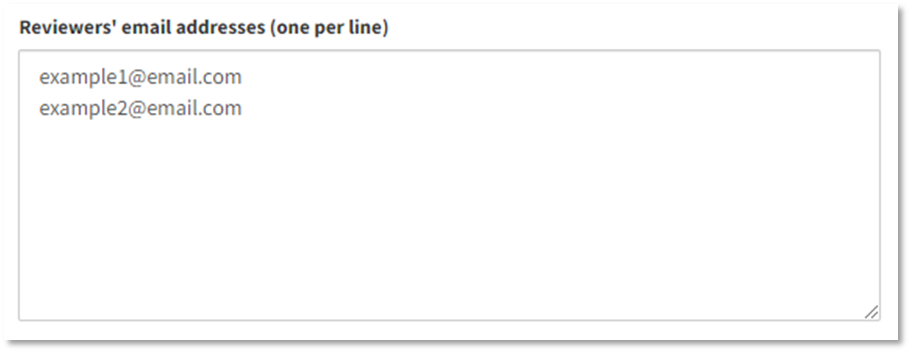
18. By default, your application can be reviewed by users that are Admins and Issuers on your OBF account, so you do not need to enter any information here and can skip to step 19 below. Optionally, you can choose to add the email addresses of external reviewers for this badge application. To do this, tick the box for ‘Use external reviewers’
enter the email address(es) in the box that appears
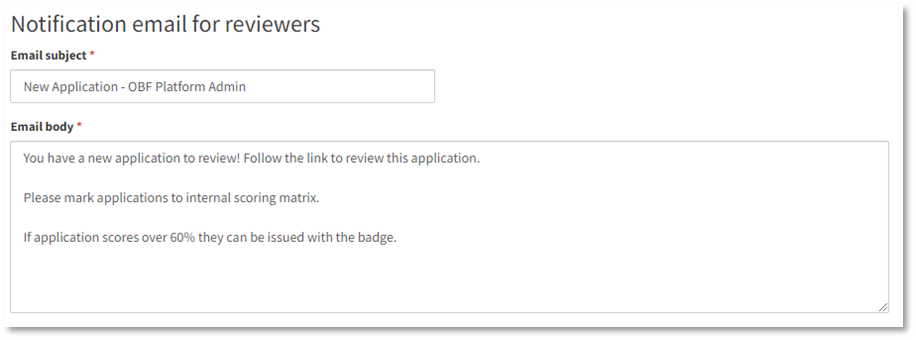
Then enter a notification email for reviewers. You may like to copy your instructions for issuers.
This will open Step 5 – Permissions |


|
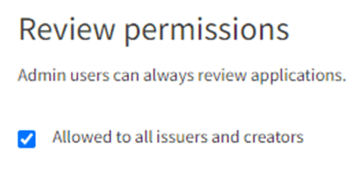
20. Manage who can review and edit this badge application. If your OBF account's subscription is Basic or Premium, this will be set by default and you can skip to step 21 below. Accounts with a Pro subscription can amend the following: Review permissions: By default, all users on your OBF account that are Admins can review this badge application. If you would also like all Issuers and Creators on your account to be able to review the application, leave this box ticked.
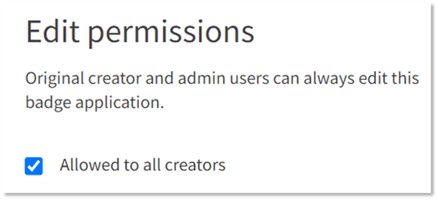
Edit permissions: This refers to who on your organisation’s Open Badge Factory account can edit this badge application. By default, you will always be able to edit it as the original creator. To allow other creators and admin users in your Open Badge Factory account to edit this badge application, leave the “Allowed to all creators” box ticked (recommended).
21. When you are happy with your selections, click ‘Continue’
This will open the final step, Settings. |

|
Here you can enter some final settings for your badge application.
Enter a title for this application. By default, this box will show the name of the badge, but we recommend choosing something different to distinguish this badge application from others that may use the same badge. 22. Language: This is automatically set to the language of your OBF account. Please note that changing the language at this stage will only change default elements of your badge application and will not translate the text you have entered throughout the form such as questions and answers.
By default, this is set to ‘Draft’ while you are creating the application and cannot be shared. The application URL below will appear with a strikethrough.
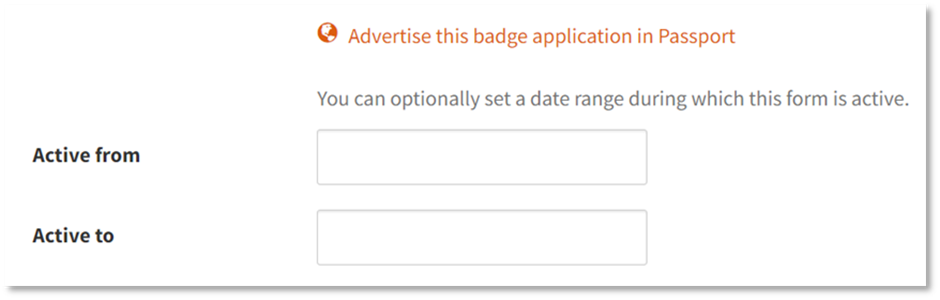
To enable sharing on this application right away, select ‘Active’. This will open up some additional settings such as advertising in passport, a date range, and will enable the application URL to become live.
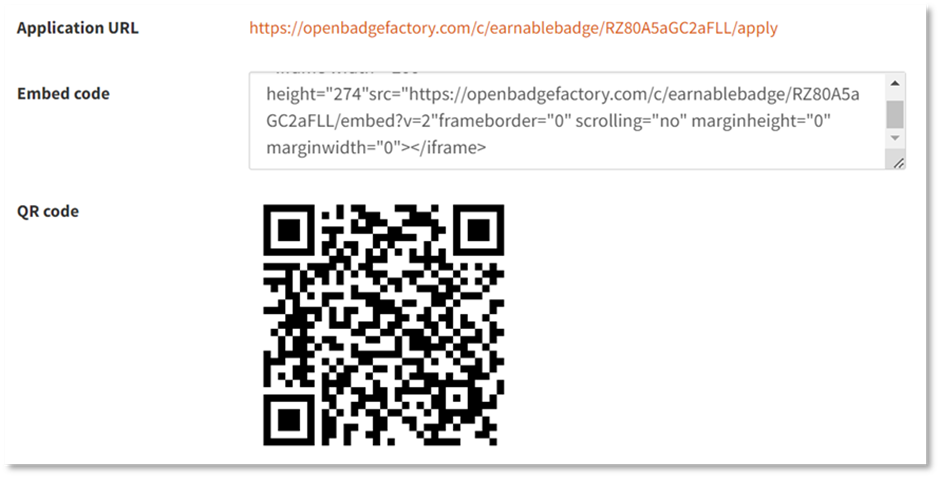
Underneath this are some sharing options for your application. You can copy / save these options now or revisit these to use at any time.
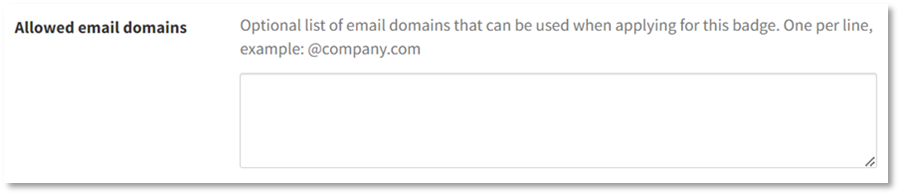
This can be useful if you would like to direct respondents to another website, e.g. My Skills Pass for sharing their badge.
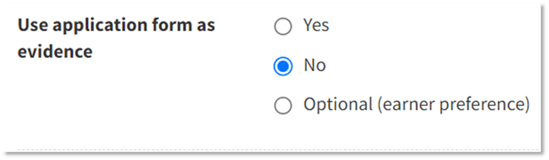
This will by default be set to ‘No’
Note: the badge earner can still choose if they want to show the badge application as evidence in the badge or not, even if the application creator has determined Yes in the above-mentioned options.
|


All done!
You will be redirected back to the Badge applications tab under creator tools and your new application will be at the top of the list.
Now the fiddly bit is over, don’t forget to share! Click here to find out ways to share your new application.