My Skills Pass/Backpack - Create a digital CV with Pages

Find out more about using the Pages function to create a digital CV on My Skills Pass or My Skills Backpack.

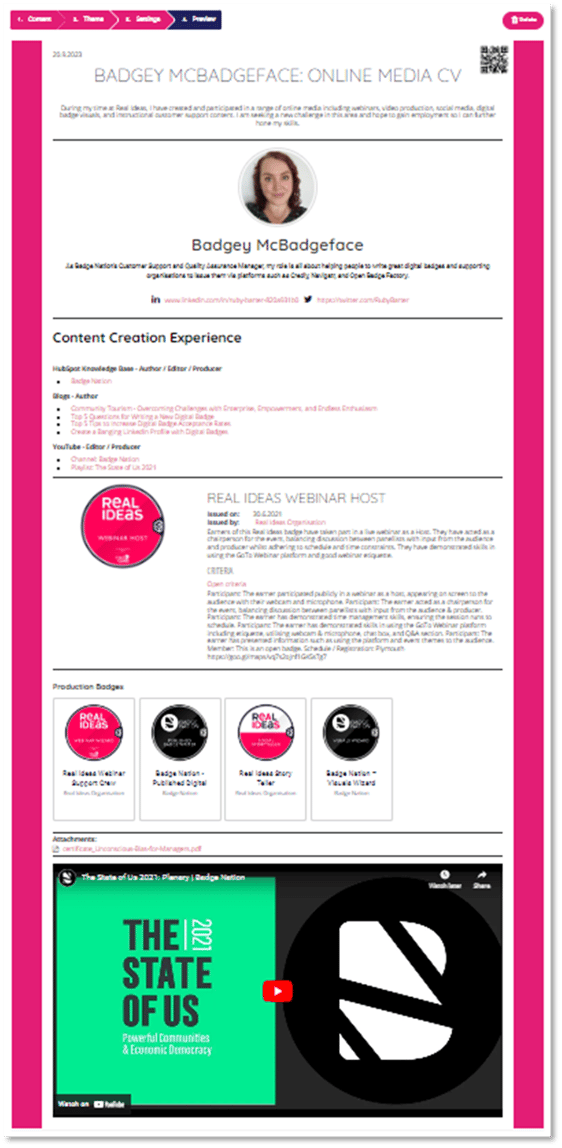
Using pages is a great way to produce a tailored digital CV that can be printed, exported to PDF, and shared via URL or QR code.

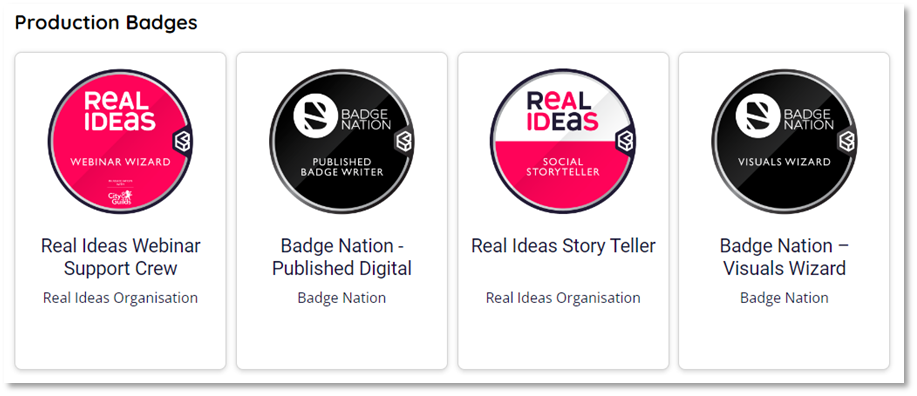
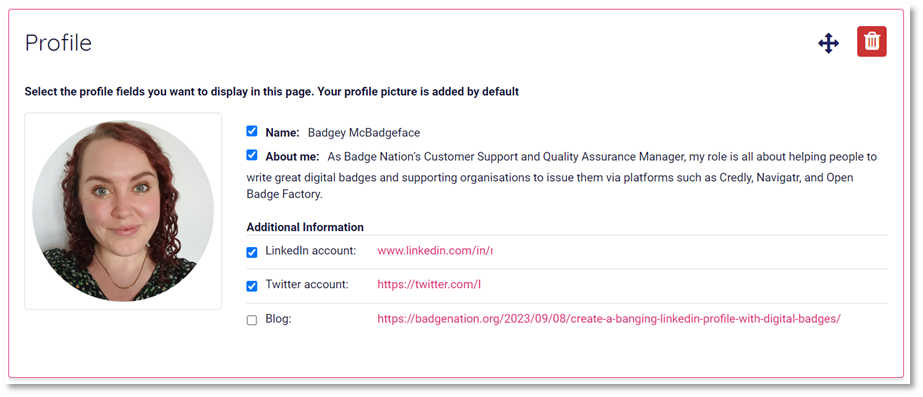
Use pages to add a selection of relevant badges, files, text and even video to show off your skills experience.

You can create multiple pages using your My Skills Pass/Backpack account, meaning you can tailor each one to the set of skills or area of experience that you need to share.

1. Log in to your My Skills Pass / My Skills Backpack account                                                           

My Skills Pass
My Skills Backpack


2. Click ‘Profile’ from the banner at the top of your screen.

This will open your profile.


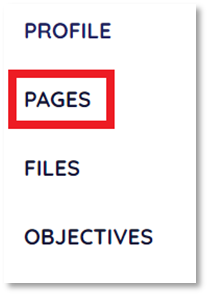
3. Click ‘Pages’ from the menu on the left.                                                                                          
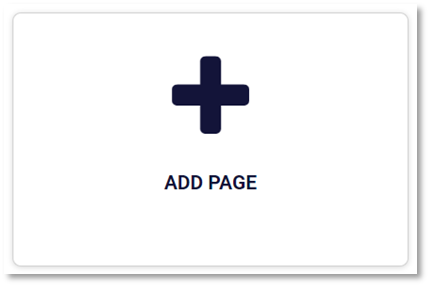
 

4. Click ‘ADD PAGE’                                                                                                                                   

This will open the options for creating your new page.


5. Enter a title for your page.

This could include your name and a brief descriptor of what the page is for.


5. Enter a description for your page.


6. Click ‘Save’


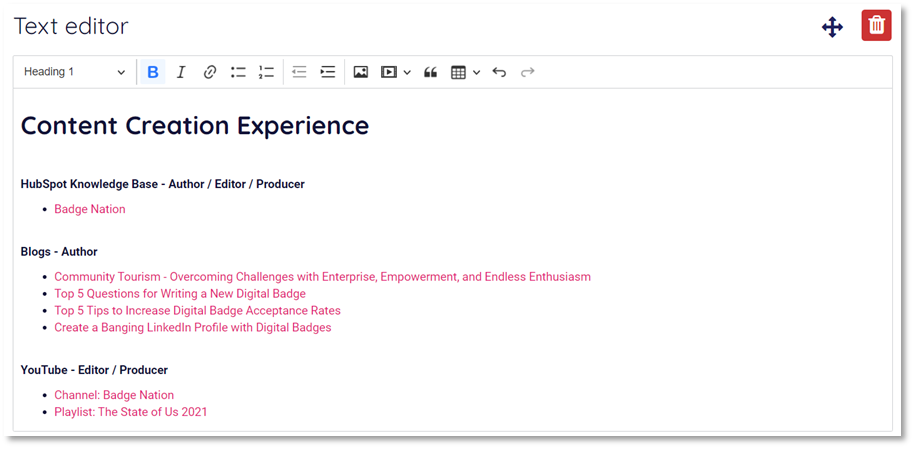
7. Click ‘Add block’ to add a section to your page.

This will open a range of options for adding content.

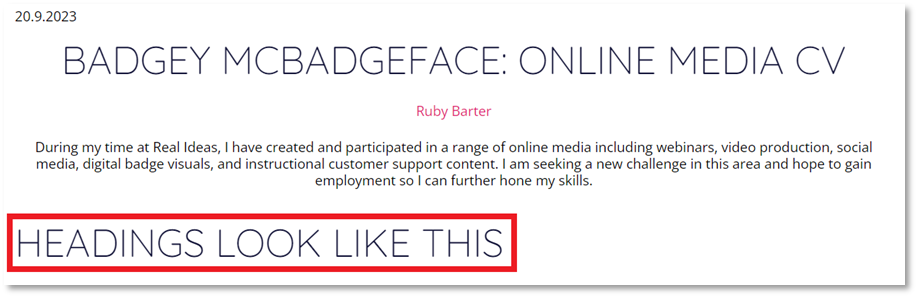
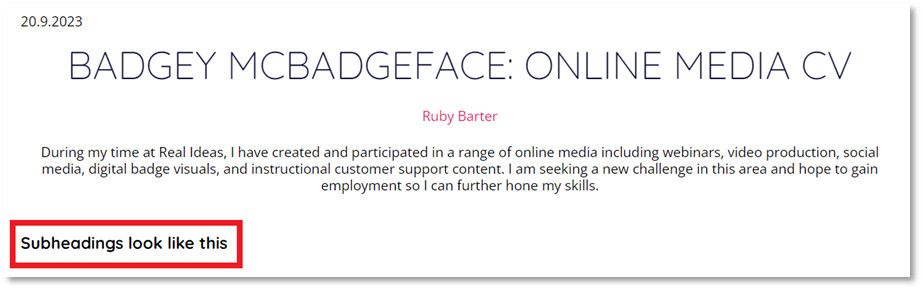
You can add multiple blocks to your page – each block can be one type.

Find out more about each type below:

Heading


Subheading


Text editor

Allows you to create a box containing text.

This is an extremely useful section for creating tables, lists of bullet points, adding images, and embedding URLs to external content e.g. blogs, YouTube videos, webpages etc.


Files

Allows you to attach a single file such as a relevant certificate, reference, transcript etc.

Choose from your existing files,

or upload a new one

Result on your page:


Badge

Allows you to highlight a single badge with two options for how it displays.

Results on your page:

Short:
Shows badge title, issue date, issuing organisation, and badge description, with a hyperlink to open the badge’s public URL on the original issuing platform.

Long:

Shows badge title, issue date, issuing organisation, badge description, and earning criteria, with a hyperlink to open the badge’s public URL on the original issuing platform.


Badge Showcase

Allows you to feature a group of relevant badges, with either image and name only, or full content.

Please note: Image and name only is the recommended setting for badge showcases, otherwise your page can become very long.

Result on your page:


Profile

This enables to you add a short summary of your My Skills Pass/Backpack profile to your page and pick and choose what individual items from your profile to display.

Result on your page:


Media

Allows you to use an embed code from YouTube or Vimeo to feature a video that you have created or featured in.

Please note that this is intended to be used for online viewing and sharing only. An embedded video is not a section that can be printed or exported to PDF file.

Result on your page:


8. Add as many blocks as you need.                                                                                                     


9. Re-order your content so it appears in exactly the way you need it to.                                     

Click the move icon in the top right-hand corner of a block.

Scroll up or down. New locations for this block will appear in a dotted rectangle.

Click on a rectangle to drop the block.

Click ‘Save’

Move onto the next step, 'Theme'.


10. Choose a theme for your page by selecting a square.


11. Use the slider to add vertical space between blocks.


12. If you would like to set lines between each section of your page, choose a border.


13. Scroll down to view a preview of your page with these settings and make edits until you are happy.


14. Click ‘Save’.

Move onto next step, ‘Settings’.


15. Enter some tags for your page by typing a tag name and pressing ‘Enter’ on your keyboard.

You may like to include some key skills or tasks featured on your page.


16. Set your page visibility:

  • Private = Only you can view this page.
  • Password protected = Set a password so only those you choose to share with can view this page.
  • Visible to registered users = This page can be viewed by others that have accounts on My Skills Pass/Backpack.
  • Public = This page can be shared publicly and is visible to anyone with the URL / QR code to your page.


17. Click ‘Save’


Move onto next step, 'Preview'.


17. Preview what your page will look like.


18. This is a great opportunity to revisit the content / theme sections and make any edits to ensure your page looks exactly how you want it. Remember to save each section as you go.

When you are happy with your preview, you're done! You can navigate away from the page.


Now the fiddly bit is done, don't forget to share! Click here to find out about the options for sharing pages.