Learn how to issue your badges to earners one at a time.
Below is a written guide for issuing your digital badges one at a time (recommended when issuing a single badge to under 10 earners at a time).
If you learn best with video, here is the 'Issuing a credential' chapter of our 'Collection Manager Training' YouTube video.
To issue your badge:
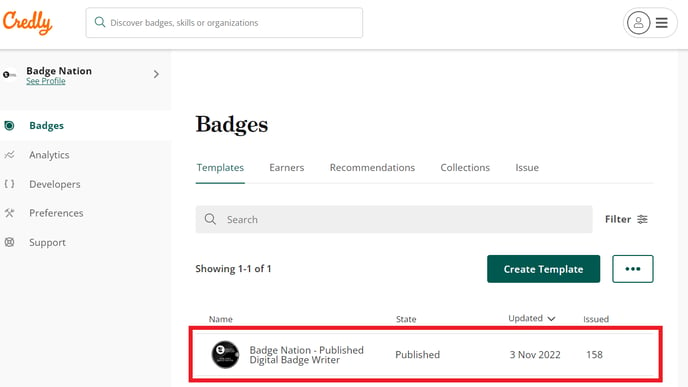
1. Sign into Credly and locate the 'Badges' tab of the admin area and select a badge from your list.
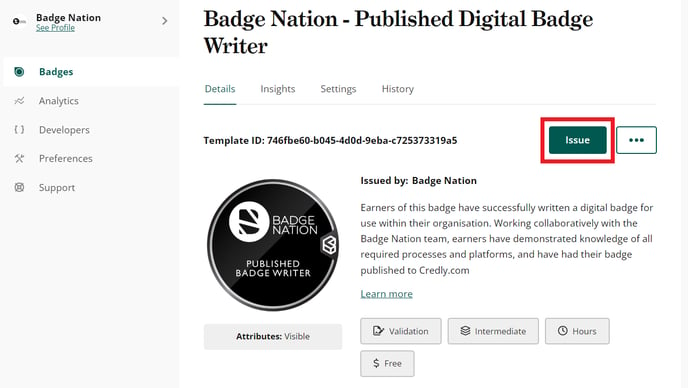
2. Click 'Issue'
3. Enter the earner's first name, last name, and email address. These fields are mandatory.
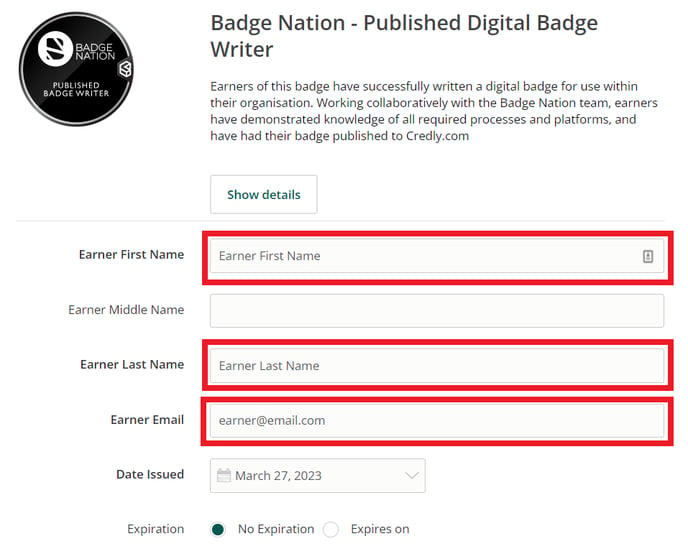
If you would like the badge to display has having been issued on a different date (e.g. if it is being backdated, or for a date in the future) you can set this by toggling the calendar next to 'Date Issued'.
By default, expiration will be set to 'No Expiration'. We recommend keeping this setting when issuing badges with Badge Nation so your earners can keep their badges for as long as they need them.
Optionally, you can submit additional information using the 'Badge Options' drop down.
4. Scroll to the bottom of the page and click 'Issue'.