Learn how to issue multiple badges, or to more than 10 earners, at one time .
Below is a written step by step guide for bulk issuing badges using Credly (recommended if you need to issue multiple different badges at the same time, or when issuing to 10 or more earners).
Bulk issuing is the process which allows you to issue one or multiple badges to many individual earners at a time. This is a great option for circumstances where you are dealing with large numbers of earners, or have several badges to issue to a group, e.g. at the end of a module, course, or programme.
If you learn best with video, here is the chapter on bulk issuing in our ‘Collection Manager Training’ YouTube video.
How can I bulk issue badges using Credly?
- To start, Sign into Credly to download a bulk issuing template
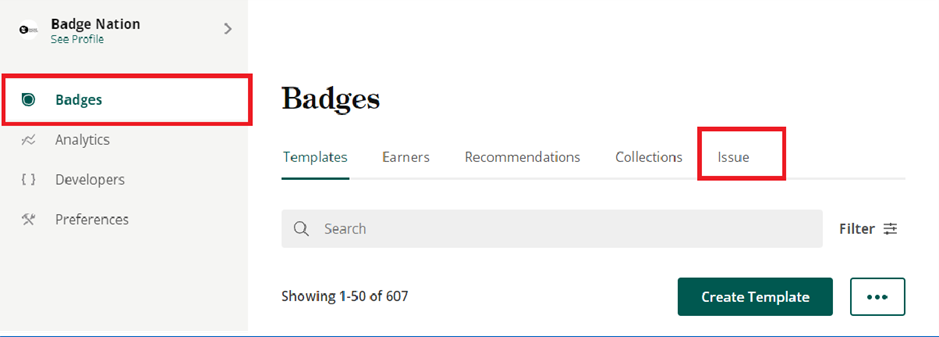
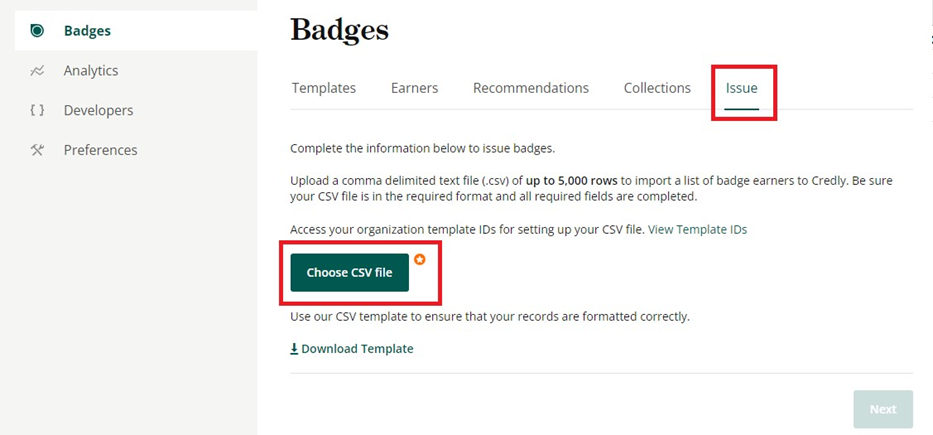
The bulk issuing template is the only document the platform will recognise when carrying out this process. To find this template, click on the ‘Badges’ bar on the left-hand side of your screen, and then click on the ‘Issue’ tab.
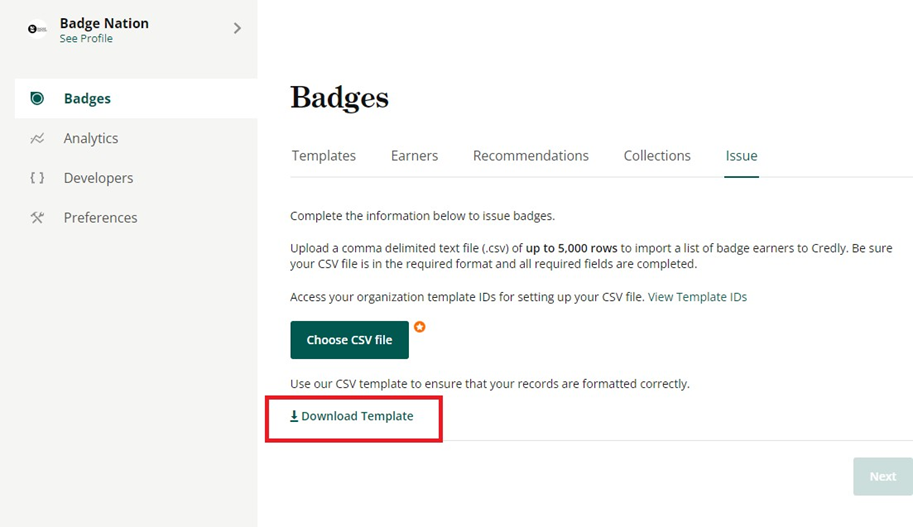
Then select ‘Download Template’:
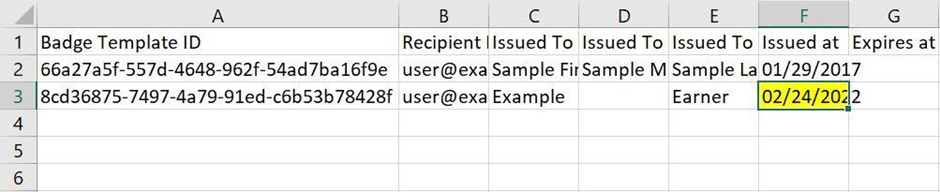
2. This bulk issue template has the first line (Row 2) below column headers pre-populated as an example to help you to fill it.
You’ll notice that there are quite a few column headers in the sheet, however there are only a few that are essential for you to complete in the sheet, these are:
- Badge Template ID (Column A)
- Earner Email (Column B)
- Earner First Name (Column C)
- Earner Last Name (Column E)
- Date of Issue (Column F)
Most issuers will only use these columns, and possibly Earner Middle Name (Column D).

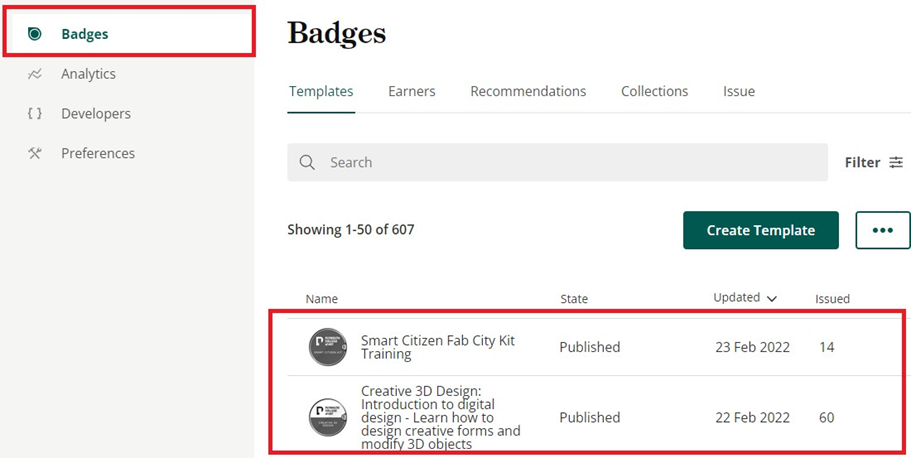
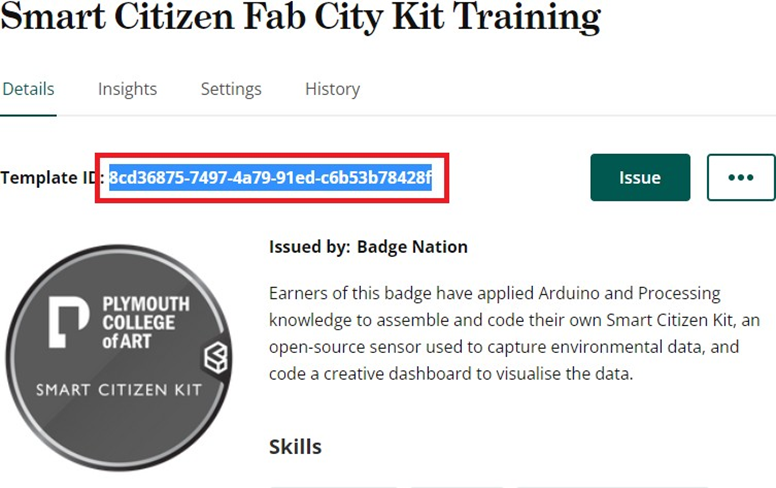
3. To find the Badge Template ID, click on ‘Badges’ from the left-hand menu. This will bring up a list of your badges, which are called ‘Templates’ in the Credly platform:
4. Select the badge you wish to bulk issue to find its Template This is a string of numbers
and letters after the text ‘Template ID:’
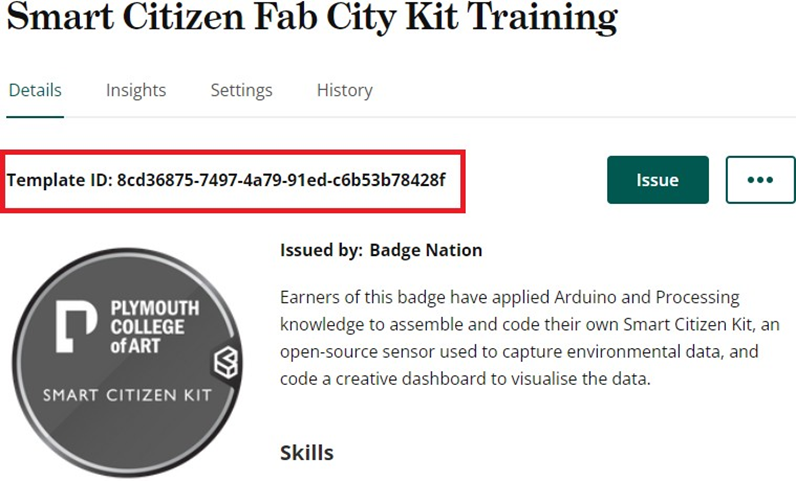
5. Copy and paste the Template ID into Column A of the spreadsheet.

6. Then add the email address (Column B)

7. First name (Column C) and last name (Column E)

8. And issuing date (Column F)
IMPORTANT NOTE: Credly reads dates in US format so it’s important that you input the date you would like the badge to be issued as MM/DD/YYYY.
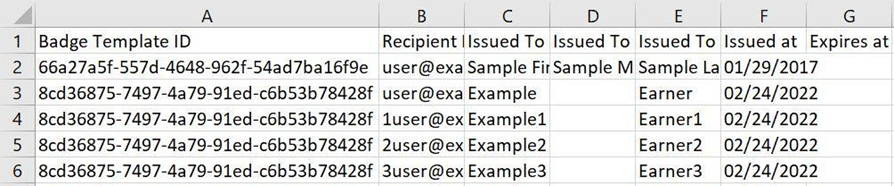
9. If you are issuing the same badge to multiple earners, you can then simply copy and paste the template ID down the sheet into as many rows as needed.
Do not do this by dragging the cell down, as excel will auto-format the cells with consecutive numbers on the end and only the top one will be correct.
This also happens with dragging the date cells down, so it is better to either use Ctrl+D in the next row down to copy the above cell, or to copy (Ctrl+C) and then paste (Ctrl+V) as standard.
Your spreadsheet will now look something like this:
10. If you have more than one badge to issue to each earner this can also be done on the same sheet, by creating another row with the same earner details but the Badge Template ID of the next badge.
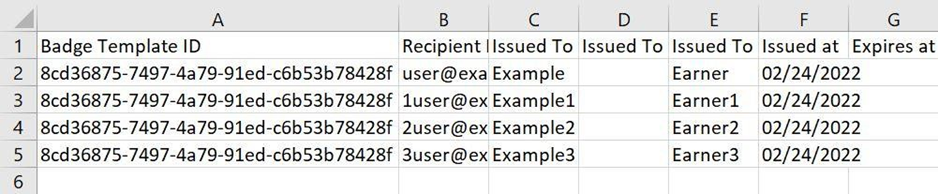
11. Remember to remove the sample row provided once you are confident you have provided all the correct information in the compulsory columns:
12. Once you have finished inputting all the information that you need into the sheet, save as a .CSV file ready for If you have any earners with special characters in their names (for example Zöe), this can be retained by saving as CSV UTF-8 which you can select from the drop-down box when saving:

13. This can then be uploaded into Credly which will check your file is
Under the ‘Issue’ tab (where you downloaded the CSV template) click the ‘Choose CSV file’ button and select the spreadsheet from your files.
Credly does simple checks like making sure essential fields are filled in, that it recognises the date as a date, there aren’t gaps at the start of any cells, and that emails follow a standard format (include @ for example), but it can’t check for spelling errors so it’s important to check these before you upload the file. Once Credly is happy that the file is correct you can then click ‘Next’ to complete the bulk issue.